Export Data from a Table in Airtable to a URL
🔴 On2Air Actions has been shutdown to focus on our On2Air Backups Airtable app Learn more about automated Airtable backups - on2air.com
Function Type: 
In this article
- Table Export Configuration Video
- General Function Configuration
- Function Configuration
- Map Export Fields
- Test Your Function
- Install Your Function
Table Export Configuration Video
General Function Configuration
- Click Create New Function ✔
- Choose your Function
- Click Add Configuration
- Set up your
Common Function Configurations - Source Connection, Source Configuration, and Trigger Mode
- Set up your Function Configuration
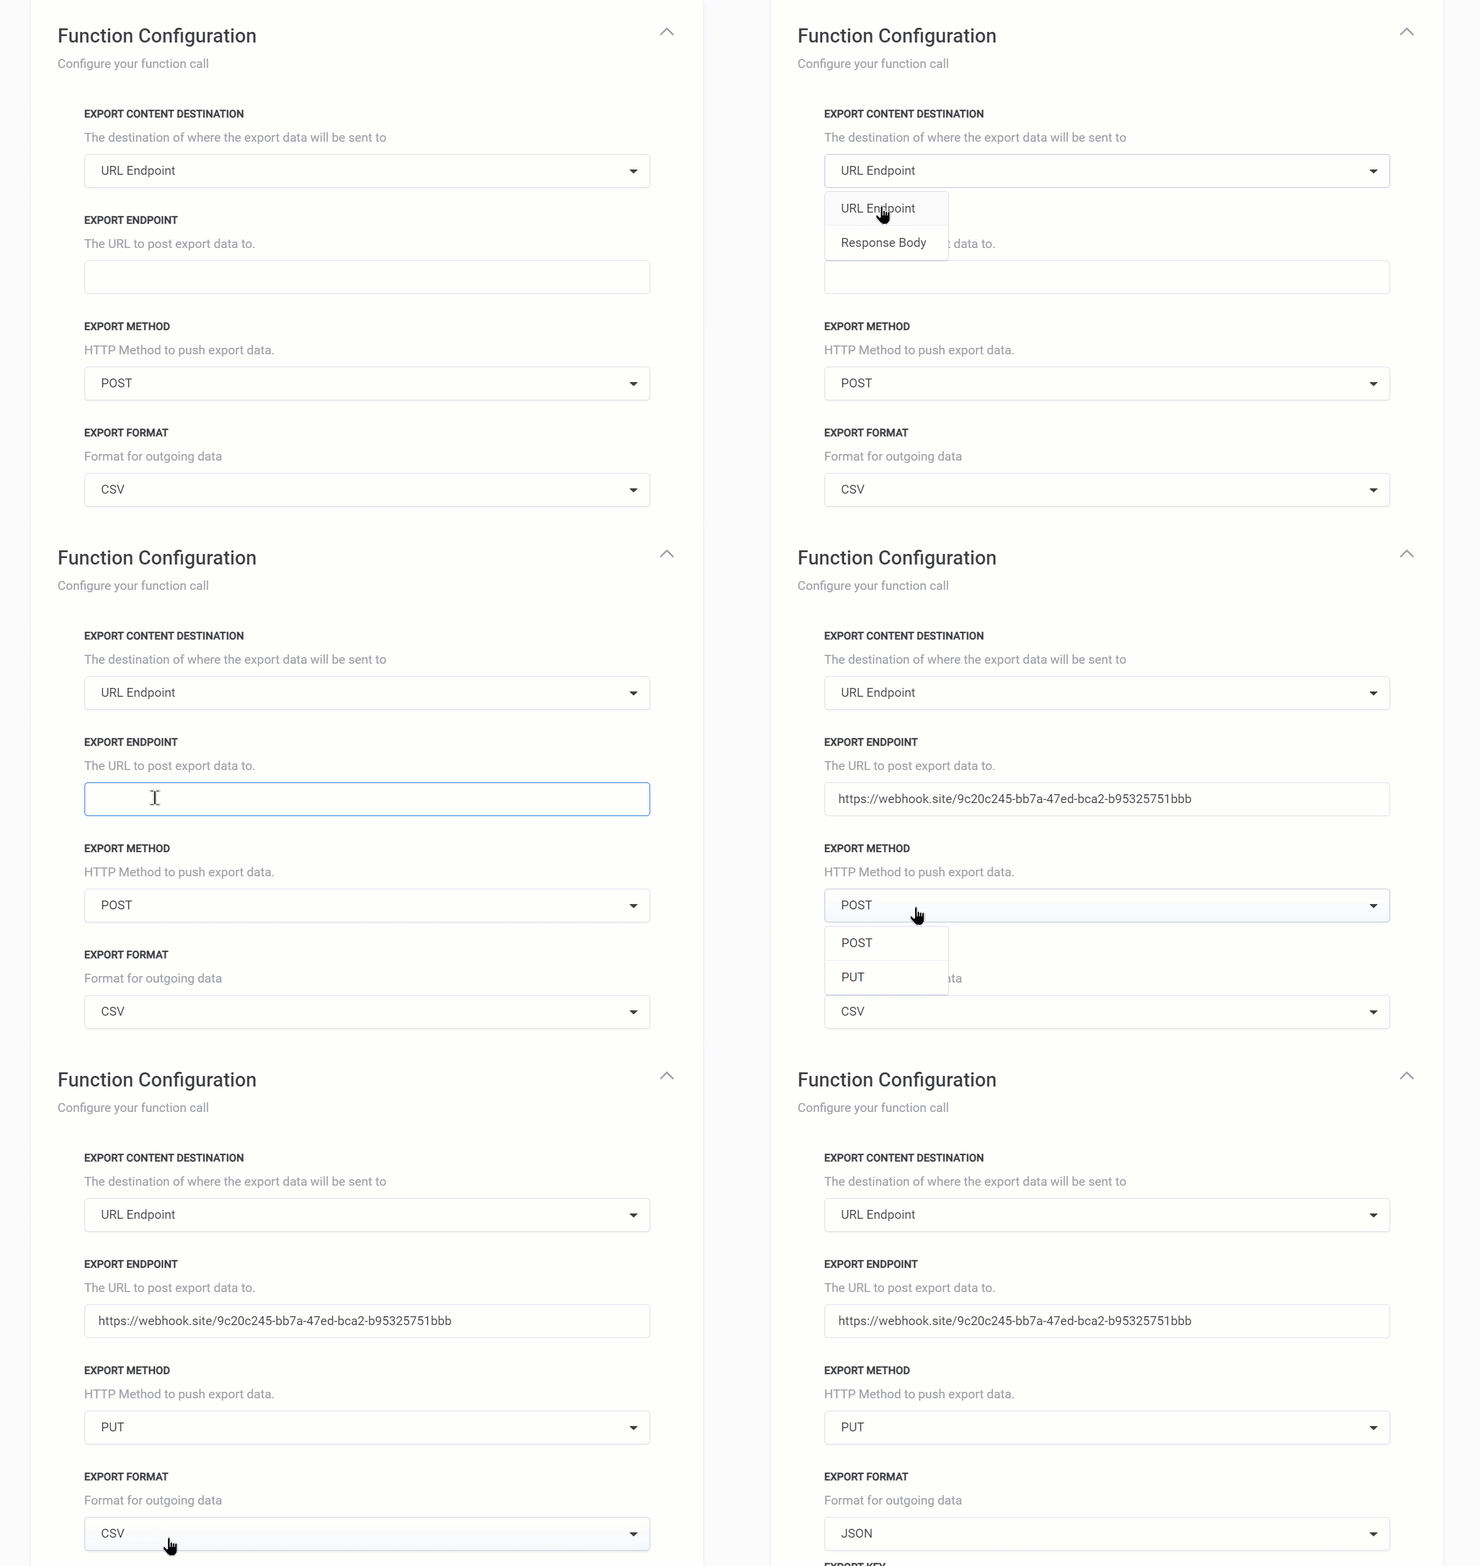
Function Configuration
Export Content Destination - The destination of where the export data will be sent to Options:
- URL Endpoint
- Response Body
Export Endpoint (URL Endpoint destination) - The URL to post export data to
Export Method (URL Endpoint destination) - HTTP Method to push export data Options:
- POST
- PUT
Export Format - Format for outgoing data Options:
- CSV
- JSON
Export Key (JSON format) - To store the export JSON in an object with a key, set the key here

Map Export Fields
Enter the Export Column/Field Label and select corresponding field. Leave key blank to use field name.
Select Fields - Select source field(s) and provide optional key. If no key, field name will be used. Add as many source fields as needed
- *Note: **Linked Record Fields are exported as the Linked Record ID. If you need to export the linked record name, use a lookup field of the Linked Table's primary field.
Sample Output Data - This is a sample of what the export data will look like
- Click Save Action Function Details
Test Your Function
- Next,
Test Your Function ✔
Before using your Function, you must test it.
Install Your Function
- Then,
Install Your Function in Your Base ✔ via a Schedule (recommended), a Zapier zap, an Airtable Automation, a Script in the Scripting app, or directly via REST API.
Go to /w=1920,quality=90,fit=scale-down)


