Use the Arrays Function to manipulate arrays (collections) of data from your Airtable records
🔴 On2Air Actions has been shutdown to focus on our On2Air Backups Airtable app Learn more about automated Airtable backups - on2air.com
Function Type: 
In this article
- Arrays Configuration
- General Function Configuration
- Extract/Convert to String
- Items in One List But Not in Others
- Unique Arrays
- Combine Arrays
- Select Random Item(s)
- Slice a subset from the array
- Reverse Array
- Sort Arrays
- Count Items
- Advanced Settings for Arrays
- Test Your Function
- Install Your Function
Arrays Configuration
General Function Configuration
- Click Create New Function ✔
- Choose your Function
- Click Add Configuration
- Set up your
Common Function Configurations - Source Connection, Source Configuration, and Trigger Mode
- Set up your Function Configuration
- Set up your Function Configuration for the Array Function you need
Each Array Function has its own setup options - See below for each option
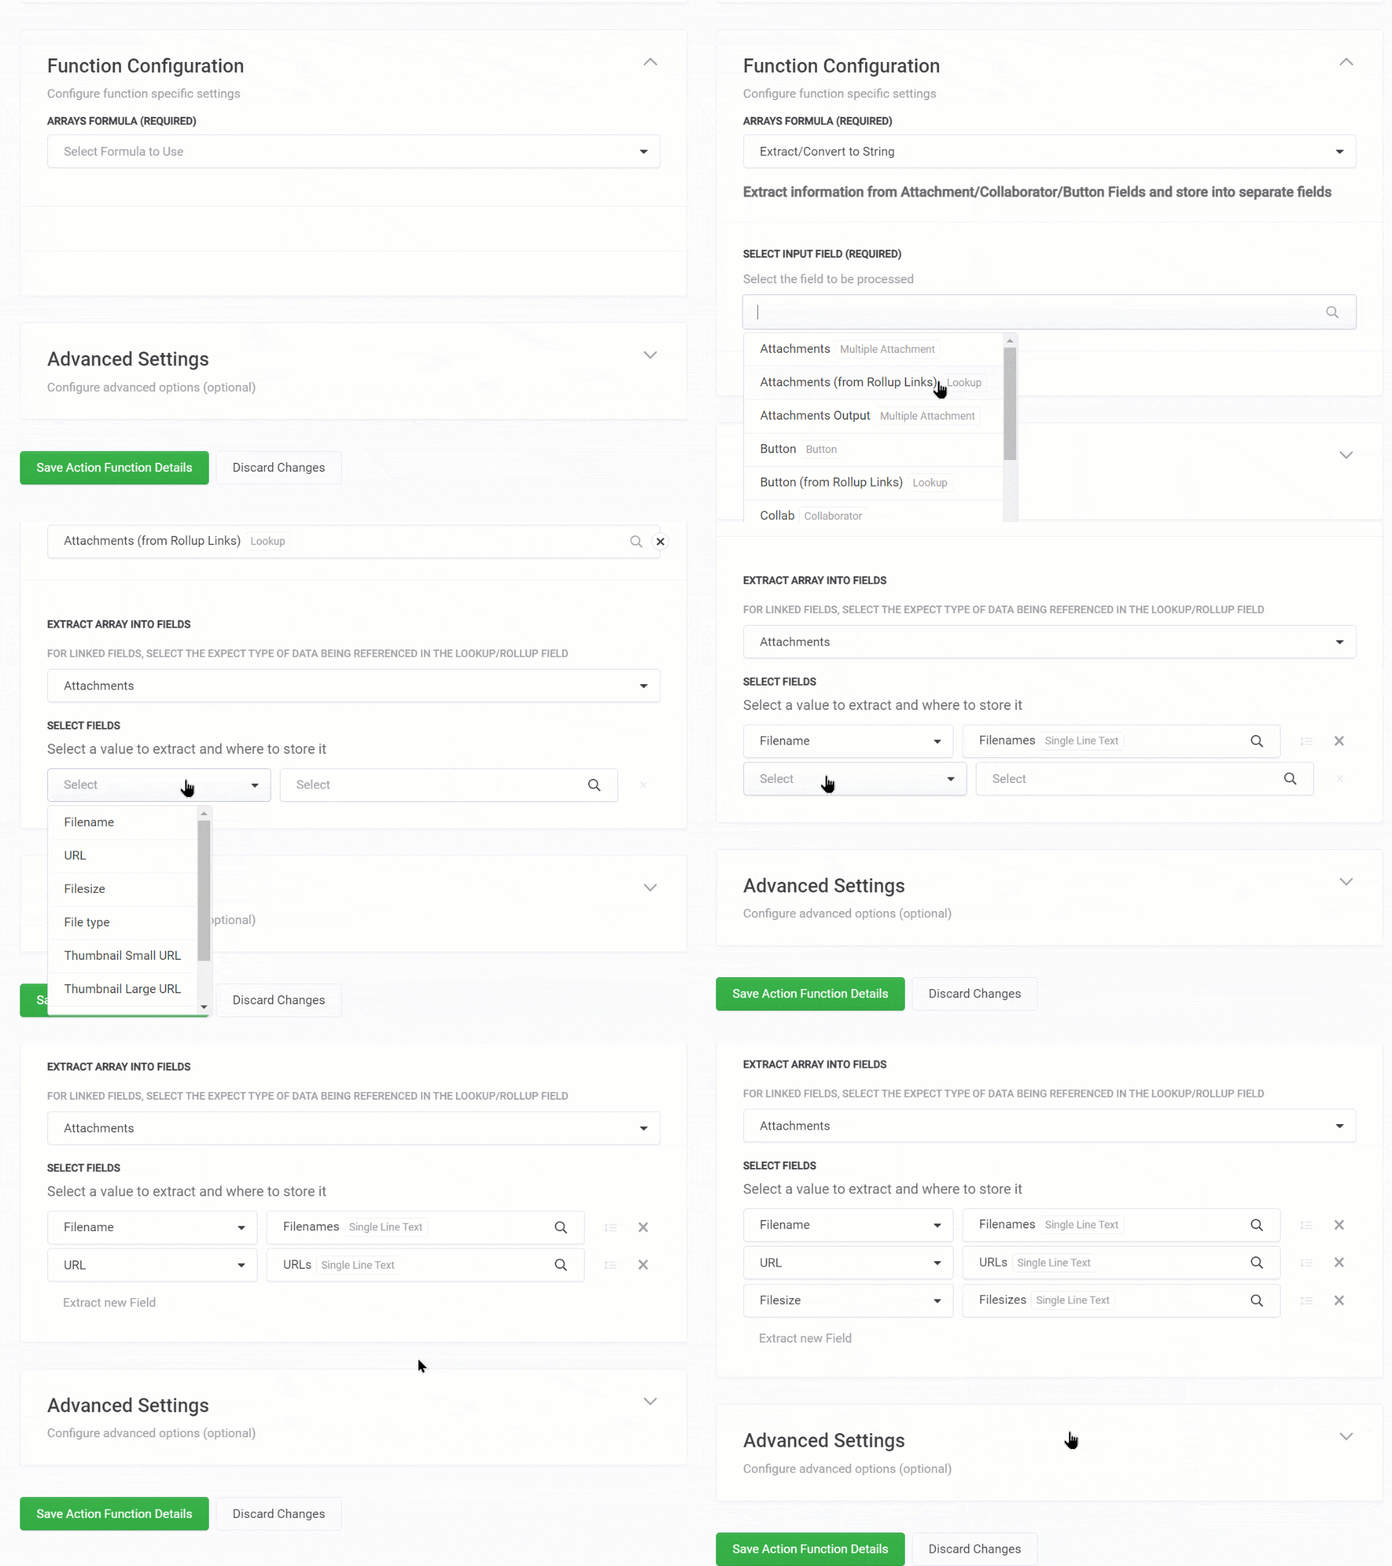
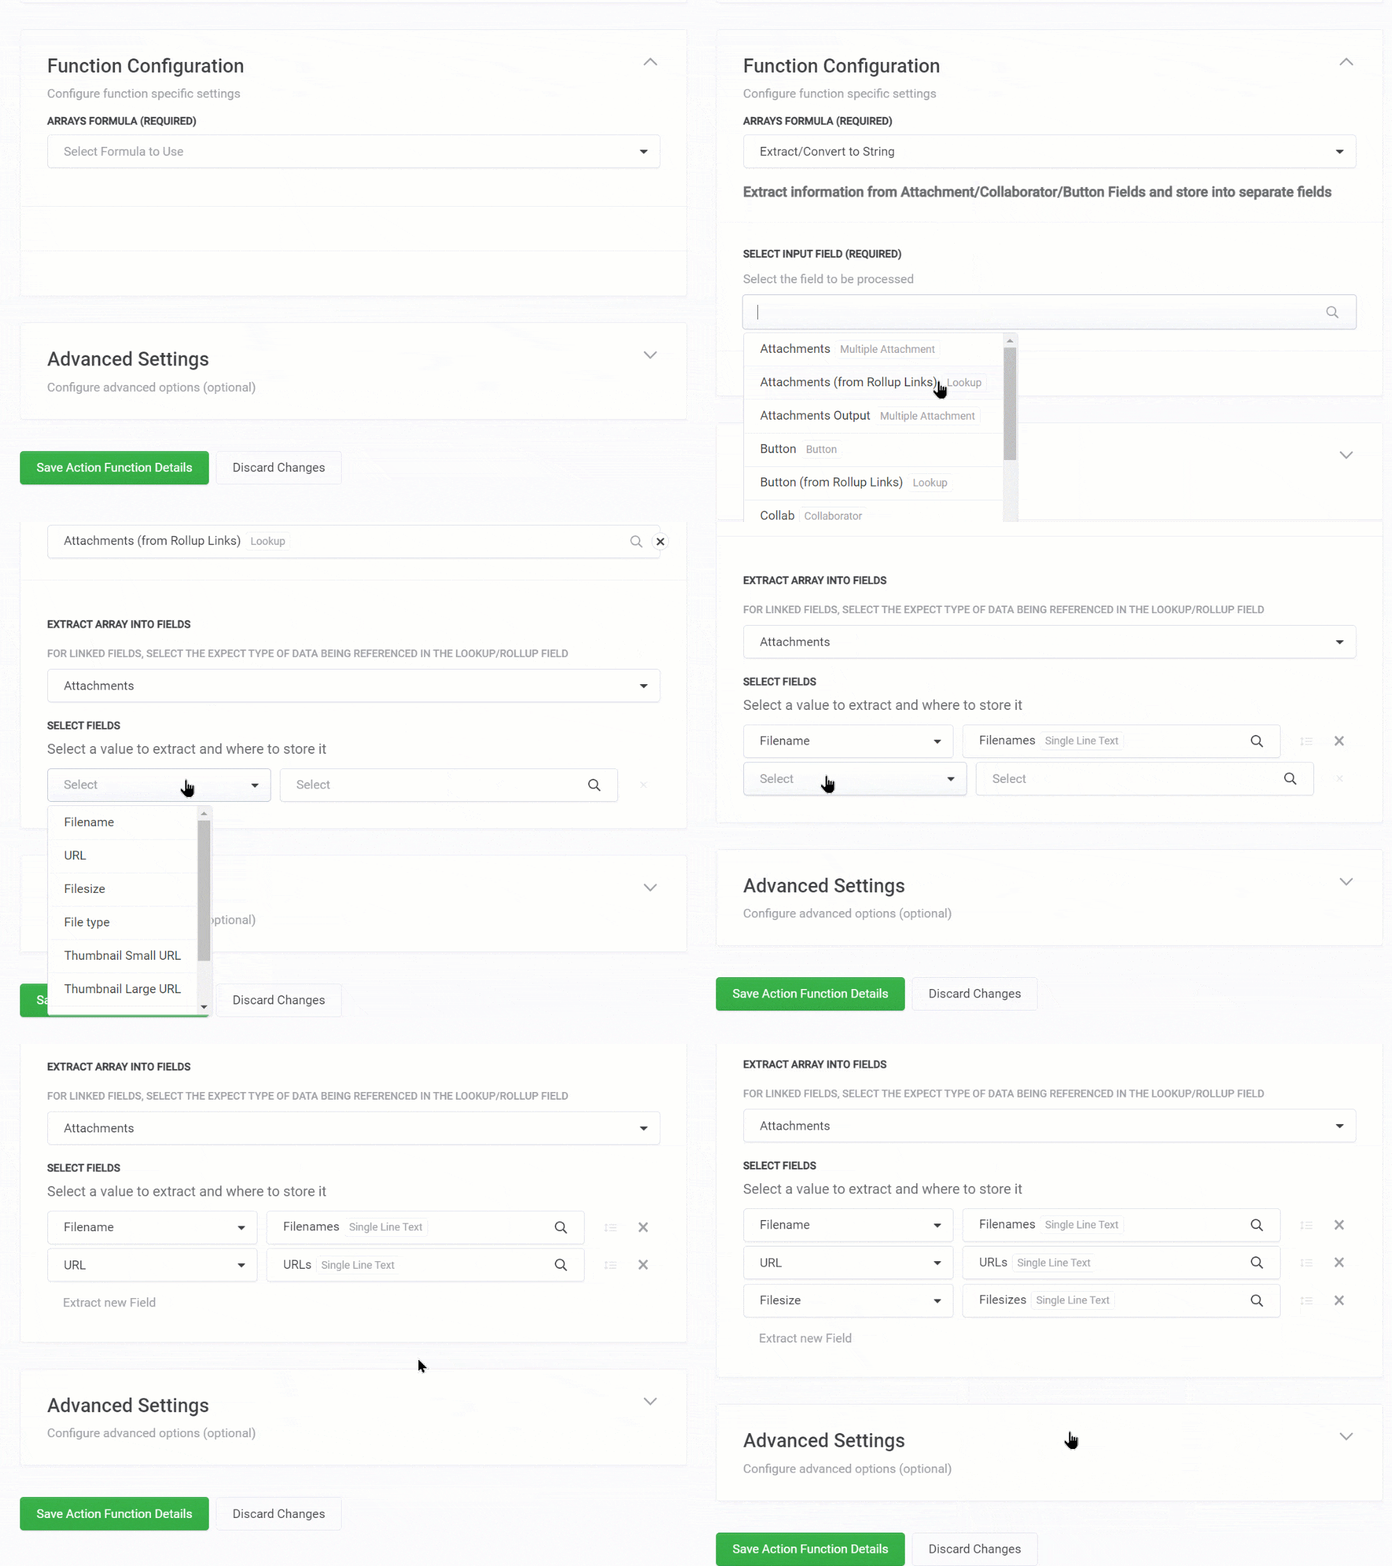
Using Extract/Convert to String option in this example

Extract/Convert to String
Extract data from Attachment, Collaborator, or Button fields to store info into separate text fields
- In Attachment - You can extract File Name, URL File Size, File Type, Thumbnail Small URL, Thumbnail Large URL, Thumbnail Full URL, or ID
- In Collaborator - You can extract Email, Name, or ID
- In Button - You can extract Label or URL
- In Select Input Field, choose the field from your base that contains the data you want to extract
- In Select Fields, choose the type of information you want to extract and then choose the text field where you want to store the data you've extracted You can choose as many Select fields as needed
- Next, choose any Advanced Settings you need
- Click Save Action Function Details

- Then Test and Install Your Function
Items in One List But Not in Others
Extract values from one field that are not found in multiple other fields and add it to another field. This is useful for searching fields and finding any values that are not present and adding it to another field.
Example: You have a Multi-select field and you want to find any unique values in the multi-select field and add it to another Multi-select field
- Input Fields - Extracts any unique data found from the 1st field, but not found in the following fields.
Choose the 1st field you want to be used as the main input field to 'watch'. Add any additional Input fields you want to be 'watched' to compare for any data not in the 1st field listed.
- Select Output Field - Select the field where you want to unique data to be stored - this must be the same field type as your 1st input field
- Next, choose any Advanced Settings you need
- Click Save Action Function Details
- Then Test and Install Your Function
Unique Arrays
Search 1 or multiple fields for unique data and store the unique values in another field. Useful for filtering out duplicates.
Example: If you have several answers in a form and you want to view only the unique answers, you can extract the unique value and save it in another field
- Input Fields - Choose 1 or more fields you want to search for unique values
- Select Output Field - Select the field where you want to unique data to be stored
- Next, choose any Advanced Settings you need
- Click Save Action Function Details
- Then Test and Install Your Function
Combine Arrays
Store data from multiple fields into a single field. Some duplicates may be in final results. Use the Unique Arrays function if don't want duplicates in your output.
(However, if your output field is a Multi-select field type, you will not have duplicates)
- Input Fields - Choose 1 or more fields you want to combine into a single field
- Select Output Field - Select the field where you want the input fields to be combined
- Next, choose any Advanced Settings you need
- Click Save Action Function Details
- Then Test and Install Your Function
Select Random Item(s)
Select a random count of items from all fields provided
- Input Fields - Choose 1 or more fields you want to extract data to be randomized
- Select Output Field - Select the field where you want to output the random data
- Random Count - Choose how many items to randomly select from your input fields Use -1 to randomize the order of all elements
- Next, choose any Advanced Settings you need
- Click Save Action Function Details
- Then Test and Install Your Function
Slice a subset from the array
Extract a subset of data from an range of data to store separately and add to a different field
- Input Fields - Choose 1 or more fields you want to extract data to be sliced or separated This can be any field type
Example: You can choose a set of data from multi-select fields or text
- Select Output Field - Select the field where you want to output the sliced data
- Slice Start - Choose where you want to start extracting data Start with 0
- Slice Count - Choose the number of items you want to slice from the list _Use -1 to slice remaining elements from Slice Start
Example: If you have a multi-select field with 10 items, you can slice items 3-7 by setting 2 as your 'Slice Start index (indexes are 0 based) and length to 4
- Next, choose any Advanced Settings you need
- Click Save Action Function Details
- Then Test and Install Your Function
Reverse Array
Reverse the order of your field data and store in another field
- Input Fields - Choose 1 or more fields you want to extract data to be reversed _Whichever order you add the fields, the function will reverse the order
- Select Output Field - Select the field where you want to output the reversed data
- Next, choose any Advanced Settings you need
- Click Save Action Function Details
- Then Test and Install Your Function
Sort Arrays
Sort the array (range of data) and store newly sorted data in another field
- Input Fields - Choose 1 or more fields you want to extract data to be sorted _Whichever order you add the fields, the function will reverse the order
- Select Output Field - Select the field where you want to output the sorted data
- Sort Key - Available with Attachment, Collaborators, or Button fields - Choose the type of data you want to sort from the field
Sort Key Options:
- Attachment - File Name, URL File Size, File Type, Thumbnail Small URL, Thumbnail Large URL, Thumbnail Full URL, or ID
- Collaborator - Email, Name, or ID
- Button - Label or URL
- Sort Order - Choose Ascending or Descending order
- Next, choose any Advanced Settings you need
- Then Test and Install Your Function
Count Items
Determine the count of all items across all fields. You can store the data in a text or number field.
- Input Fields - Choose 1 or more fields you want to extract data to be counted
- Select Output Field - Select the field where you want to output the total count
- Next, choose any Advanced Settings you need
- Click Save Action Function Details
- Then Test and Install Your Function
Advanced Settings for Arrays
Input Separator - Add an input separator between text elements. This will add a separation value to any field data.
You can use any character, such as a comma (,) or dash (-). If you use \n, you can add a new line in your text field. You can also use HTML.
Output Separator - Add an output separator between text elements. This will add a separation value to any field data.
You can use any character, such as a comma (,) or dash (-). If you use \n, you can add a new line in your text field. You can also use HTML.
Disable Trim - Enable this setting to prevent text values from being trimmed before processing. By default, text values WILL be trimmed to avoid extra spaces at the front of end of the value.
Last Updated - Choose a date field to keep track of the last time the field was updated
Test Your Function
- Next,
Test Your Function ✔
Before using your Function, you must test it.
Install Your Function
- Then,
Install Your Function in Your Base ✔ via a Schedule (recommended), a Zapier zap, an Airtable Automation, a Script in the Scripting app, or directly via REST API.
Go to /w=1920,quality=90,fit=scale-down)


